Saturday, October 15, 2016

Using Chalk Paint on a Large Chest of Drawers


This chest is becoming a dusty blue-green!
I'm chalk painting it. Do I know what I'm doing? Almost!

This post is a bit long, but I've learned quite a lot about chalk painting, and wish I'd found it all in one post, therefore this is my attempt to give you more.

Since painting the little chest the post before this told you about, I've done more research about chalk paint, how it should go on, and what to do after painting it and letting the paint dry. And I've begun work on the above pictured chest.

The steps are not quite the same as the first articles stated. The claim was no prep is ever needed, which is not true. At the very least the piece you plan to paint must be cleaned, wiped down to get any dirt or grime off.

The chest above I bought from a neat and clean antique store. And it looked very clean. But, when I wiped it off with a disinfectant clothes there was yellow grime on the wipes. I thought that was more than enough to do before applying the paint, therefore I went ahead.

 Most of the chest the paint covered nicely and it went on quickly. But, some places I knew when I was painting that these may be areas where the paint might come off easily. I was correct.

The You Tube videos and articles I'd read say to use a damp cloth to wipe down the chest after painting. No comments about letting the paint dry but that seemed obvious so I did do that. 

Researching again I learned when the paint has dried - at least 4 to 6 hours but preferably 24 hours - the next step is to lightly sand the piece. After trying that and taking off the paint in several places, I went back to the Internet. Finer sand paper is best! 

The results of sanding with the fine sandpaper are amazing, because the surface becomes very smooth to the touch. It will change slightly in color as well. 

In the case of my chest of drawers, as I've mentioned, some of the paint came off in unattractive splotches, so I've just painted a second coating, making sure to get as thick a coat of paint as possible.

My first coast was also very rough as the with my first experience painting the small cabinet. This sent me once again to the Internet for more information. One person told about some of the things he had done to make the plaster of paris finer grained. The basic idea was to smash it. So, I put mine into a sealed plastic bag, and used a marble rolling pin! It worked well. Next I put the water in a bottle with a lid, added the plaster of pairs I'd smashed, tightened the lid and shook it well. This also helped, so when I mixed in the paint it went on much less rough. 

I've just finished my second coat of chalk paint. It's afternoon, so I'll let the paint dry until tomorrow. I've purchased sandpaper #400 which I'll use in the morning. The next step after the light sanding will be applying the clean wax coat with a clean cloth, and wiping off and the excess. After a few hours to allow the wax to dry, the final step will be to buff the surface with a clean cloth.

If my goal was to make the chest appear old and/or shabby chic I would do a bit more sanding and expose the finish underneath on the corners of the drawers etc. and then perhaps use a wax with a dark tent wiping it into spaces that might be darkened by a build up of dust thru the years, and again wiping off the excess. 

I'll post pictures of the process and end result after this piece is finished.

For many interesting and informative videos and articles do a search or two. But, as I recently learned, do not expect all the information you need to be in just one video or post!

Continue to learn more about, or even how to do new things. It will keep you feeling younger. It does me!

Prayers for health, comfort and peace.

Friday, October 14, 2016

Final Day for Chalk Painting a Chest of Drawers

Final, final steps.

Yesterday I sanded and waxed 
the chest and drawers.

Today I buffed the wax. vacuumed the 
drawers and added clean paper. 

You know modern chests have a paper 
similar to contact paper on the bottoms 
of the drawers, but old chests have wooden 
drawers, so without paper on the bottoms 
you may end up with splinters in your 
other drawers and maybe your bottom! 

Lastly I tightened the knobs and 
pronounced the project finished!


The finish is very smooth and the chest
looks OK but not perfect.
 

Chalk painting is more difficult than I
 thought from the information online.

There isn't anything wrong with the top,
I just enjoy the look of a scarf on it.

One last thing about chalk painting with
the plaster of paris, water and paint mix,
DO NOT WASH THE PLASTER OF PARIS
DOWN YOUR DRAINS, IT WILL CLOG THEM!!!
I used a bucket of water to wash out the
brushes and any other tools used for 
painting, and then dumped the water
outside in a graveled area by the garage.
I threw away the rags used for wiping 
down after sanding, as well as those used
to wax and buff. 


Now, when I rest up from this project, 
I'll go back and sand, wax and buff the small
cabinet I painted before I knew the finishing steps.
It is still sporting it's very rough surface.


Good Evening Everyone!

Thursday, October 13, 2016

Day Two & Backtracking * Using Chalk Paint on a Large Chest of Drawers

First:
It's really better to put away one project before beginning another! Advice from someone who knows. The studio of a person with a cluttered mind. Proof, it's not necessary to be perfect, nor for your studio to be overlyorganized to make and do artsy stuff! 

Encouraging? Hope it is.


Back tracking:
Material I've used or will be using today 
on this project;
included are my experiences with them.


Chalk paint recipe: 

1/3 cup water, mixed with 1/3 plaster of paris. This water and plaster mix is then mixed with 1 cup latex paint. (Sample jars from the home improvement stores are usually one cup, so perfect for this recipe.)

In order to make the plaster mix smoother: 
I placed the 1/3 cup plaster of paris in the plastic bag, used this marble rolling pin to crush the grains of plaster, mixed the water and plaster in the water bottle,replaced the lid and shook the 
mixture. There are other ways to achieve a smoother mix. My decision to use this manner was dictated by materials available to me without spending more money.

Minimal prep of surface to be painted:
Although in nearly all the information I found online claimed no prep, or almost no prep is needed, but my experience is skipping some prep work is not advisable. A light sanding with a courser 
sandpaper than the final sanding will help rough up the areas where the varnish or other finish on the piece is undamaged, and is a step 
I wish I'd done! I did wipe most surfaceswith disinfectant wipes, however a better choice might have been a degreaser, as old furniture is very apt to have a greasy and grimey surface to repel most any paint.

Final step:
Clear wax applied with a cloth; excess wiped off.  I'll be trying my hand at this today.There are choices in waxes. There are different 
makers  and hues, most common are clear, light and dark. Some say it's possible to use other kinds of waxes such as Minwax, but reading labels I opted to stay with those which at least claim to be made specifically for chalk painted surfaces as it ought to be more reliable. We'll see by how my choice works.

Final sanding:
My husband suggested steel wool could be used.


I'll try this first fine grain sandpaper before the steel wool.

Cluttered mind addition:
CD/radio/tape player for noise or as needed extra stimulus while working. Personally I listen to books on CDs or tapes. Sometimes I like to listen to music on CD. 

**********************
Some photos of the chest and drawers 
waiting on today's sanding and waxing.


This is how the surface looks after first coat of paint, light sanding,
second coat of paint and before the second sanding and waxing.


The first coating, without my vigorously mixed plaster and water, was MUCH more rough with the little globs of plaster 
very visible. Even the rough surface sanded down, but of course, less roughness will take less work to sand smooth.

Until tomorrow! We will see how this all works.  So far, I love the color I've chosen and am optimistic of the outcome.

May this be a beautiful day for all of you.


Saturday, October 8, 2016

My First Lesson in Making and Using Chalk Paint

This is so me!

Before I knew what I was doing I painted a little cabinet (it's pictured in it's "before" state in the post just before this one) in chalk paint I mixed myself. It came out bumpy and I didn't know why but it's not visible so, left it that way.

There are cut out placed that have woven rattan like coverings attached from the inside on each one. I believe the cabinet was some sort of radio case or speaker box. Found a small hole on one side that looks as if a cord ran thru it. The bottom inside has strange holes as well, so another indication that it was some kind of electrical equipment box.

Here is the little cabinet after I decorated it.

The pictures in the spaces I cut out of a 2013, nice - thick paper, calendar. All but the front picture I just placed in the spaces and they stayed put, so did nothing else. 

This means I can change them as I want very easily and since the cabinet will not be in a humid 
place and we have no kiddos or animals here, they will stay where they are until I want to take 
them out. The center on is glued with Elmers. I thought they all looked pretty.


This is how I am using the cabinet.


That is my computer's printer, and inside I have all the various papers. Just around the corner is a little space at that end of my kitchen with a bit of counter top at desk height with cabinets above. The perfect spot for my computer and a little card file for those countless passwords that will not stay in my head. And cook books and address books etc. are in the cabinets above. As if this little cabinet was made for this purpose and this space.

Since I painted the piece before I watched the YouTube videos on how to make the paint and how to use it, I didn't try distressing the piece. Now that it's done and back in place, I'll likely just leave it as it is. However, just this morning I have leaned a bunch of stuff!

On the videos I found no less than four actual recipes for making chalk paint, and that the name chalk paint is actually Annie Sloan's discovery and name is hers, so some call it chalk style paint. It is a mix of latex paint and some other agent to thicken it and make the paint cover over most finishes without priming or at least with out much prime work. The most common additive is plaster of paris and a bit of water. Some people actually follow the recipe - 1/3 cup p of p, sprinkled into 1/3 cup of water and gently stirred to a rather smooth consistency and 1 cup of latex paint. Others remind me of the way grandmothers make biscuits or cakes, a little of this with a little more of that and a pinch of the next. 

Each mixture can work. The small cabinet was my test piece. The piece I'm planning to really work on is the large chest of drawers, also shown in the previous post. My reason for wanting to paint it is that the poor thing smells like cigarettes and since we don't smoke and never have it's not pleasant. In fact the odor gives me a slight head ache. I have used craft paint to paint some pieces of furniture in the past and this sealed in the odor, but the paint can be cleaned right off with a bit of rubbing. Obviously, depending on where the piece is and how many people are likely to touch it, this can be no problem or a big problem. 

I have learned quite a lot just in this one morning of video watching. It feels as if I went to a seminar, but didn't have to get gressed or leave my recliner or pay more than my Internet fee! Quite nice. It's fun to live now.

As I work on the next piece I'll write another blog and of course post it on my Facebook Page. Follow me if you would like, under my name Janet Toney. You'll see a picture of me (a little bit younger but still me) and one of my fall flowers in a big, pretty punch bowl.

Have a great Saturday.

Tuesday, September 13, 2016

Decorations and Stuff Like That


Recently my attention has gone to 

home decorating and stuff like that:


The Bed Spread

About 20 or more years ago, I bought a crocheted bed spread at an antique store. It was a bit pricey for me, $60.00, but I really loved it. When I got it home and spread it out there were two places that were worn out. So my use of it was limited but I've always loved it anyway.


Fast forward past moves over seas, and across the US and we are to this summer. I still have the bed spread, but stopped useing it.

A young woman from church and her husband began coming up the mountain, where we live, and stopping by when we were home. We have similar interests, crafts, art and photography to name a few. The photography brought her husband up here, so he could take pictures of the scenery.

She and I bartered - I said I would reframe a nice print she had and she would try to fix my bed spread.

I didn't realize my young friend only worked in thick yarns! From what she said, I don't think she had even seen crochet hooks small enough for the thread needed to mend the spread. But she did research and practiced and asked other ladies at church for help. They gave her advice, books, and etc. One of the ladies was my sister-in-law, who also crochets, but it hadn't accrued to me to ask her for help with my spread!

All turned out well. This young lady is nothing if not determined. She learned what she needed to know and mended the spread! I was so excited to get it back. When I picked it up I was very surprised to learn she had mended 14 places!

She was happy with her newly framed print, with it's new dark blue double matt, new glass, and my freshening of the frame with a wash of golden brown acrylic paint over the original dark brown.
As for myself, I am very, very happy with the mending job on my bed spread.

And now, I use it on a queen sized bed in the front bedroom!


All I need now - 
lace on the pillow cases 
OR, crocheted shams!

********************************************


The Little Table

One day it seemed to me that a small table next to one of the beds in the back bed room would be nice. So I did what I usually do when I need furniture, and especially small little pieces, I visited the local thrift, home decor and antique stores.


I found the perfect size table in an antique store. It had one corner that looked like someone's doggie might have thought the table looked like a snack! There was another space around one corner where some trim had broken off and was gone. Those little things meant a low price. It was marked $15.00.

I snatched it up, surprising the store owner. But the table does have a charm. Around the top it has some interesting wood work and the some cut away work. When the owner seemed to wonder why I'd buy the little table I told him, it only has to hold a little lamp and a coaster for water, and well, maybe the TV remote! Just a simple doily would take attention from the dings; especially after I darkened the dings to match the rest of the piece.

When I got it home I did just what I told that store owner and it looked fine. No one noticed it's boo boos.

Being me, it wasn't long before I moved something around. A rocker entered the room, and it needed a table. The slightly scared one was the perfect size, and there was now room for a larger table to sit next to the bed. Next to the rocker, the small table's dings showed more.

So that's when I took my cheap find back to my garage/studio. I used wood putty to fill in the eaten corner, and to make some trim. It's not a good fill job, but it's a camo' fill. Next it seemed a fun idea to paint the top a bright, happy peachy pink! So, I sanded, and then cleaned, and painted the top of the table. I had a little doily almost the same color as the table in my drawer of doilies. I dug it out and placed it on the newly enlivened table! I like it, alot. My husband thought I painted the doily on. Probably he thought that because I have been known to do similar things, but this time, it's not a painting.


Here is the sweet table saved 
to live another life time.


You can see bottom of the table and the 
interesting legs and the cut outs 
just under the table top.


Here are the "camouflaged" corners. 
I admit, not perfect work, 
but quite adequate.
Maybe one day I will go to the trouble 
of making a mold to form perfect 
replacements, but right now, it's not 
important and unless I show my quests, 
I doubt anyone will notice, or care!


**********************************************

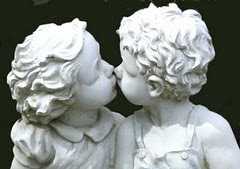
An Addition to My Winged Creature Collection

In thrift and antique stores I often see dolls that I find so appealing I have to adopt them! I've been trying to resist dolls, but now I'm finding angel and cherob dolls! Well, of course I have to give them a home with my other winged creatures!

My most recent adoption was of a red headed angle. She's called a primative. She was made to look old and worn, and in fact may have been made of older cloth. The apron actually looks like an old doily. Her hair is long and a bit messy. To me she is beautiful.


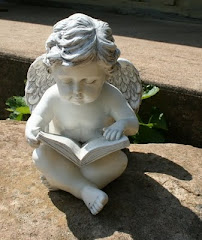
Here she is my newest angel.


Other winged creatures.


Now, let me tell you, this most recent addition made me aware of something I hadn't thought of before. There are many, many angel dolls, figurines, images etc. with red or redish hair! I googled this and found no explanations but lots of beautiful images of red headed angels and people! You should do that, type in red headed angels and look at the images! Some of the prettiest, most appealing pictures ever! A fun little distraction from the everyday - just like most artsy things!


**********************************************


Other dolls collected from thrift 
and antique stores. 
Of course this isn't all of them. 


******************************************************************
The images below are of several pieces of furniture I have purchased in thirst and antique stores. Most I painted. And as with the dolls, this isn't the entire collection. Just love this was of furnishing our home with items I believe are beautiful, and at the same time are less costly than new furniture.


I've begun to collect gold framed mirrors.


This was the last mirror I purchased. 
The rose picture, jewelry chest,
small bench and chair are all other 
antique and thrift store finds.


Just placed this mirror in the bathroom. 
Not sure why I didn't do that sooner.
It makes the room look larger. 
Reflected in it you can see another gold 
framed mirror on the opposite wall.


This little mirror just makes me smile. 
Well, until I check out my hair in it.


Painted this little cabinet inside 
and out with craft paint, 
the kind you can get at the 
discount store for a dollar or less. 


I've had this chest, which we always 
use for napkins and table cloths etc., 
for years. Bought it at a garage sale 
in Arizona for $8.00. No matter where 
we have lived it's always been useful.


This strange little cabinet is storing 
my computer paper and the printer
 is on top of it.


The shelves are other treasures 
I've found in antique stores,
as are some of the plates 
you can see here. 


This chest I've recently purchased. 
It's quite sturdy and has lots of drawers. 

After shopping with my sister-in-law in Washington DC for new furniture, I came back home and couldn't with to get to the store where I'd seen this chest. It was a fourth of the sale price on those I saw at the furniture stores, ON SALE!


Even though I do artwork, which covers most of my walls (I do sell some pieces) I also sometimes fall in love with older prints. This one was falling out of the frame and had gotten wet at some time, as there was a line and some discoloring on the bottom of the print. 

I used my pencils, and gently colored over the water line and sort of feathered the color between the stained section and the unstained, so with the glass on top, the water damage is not visible at all. 

I like the frame as well and did some touch up painting on it as well. 

Since I not only do art work but also had a frame shop in Arizona for a few years, and still have the matt cutters, it was quite simple to tuck the print back into position. I used watercolor paper as what's called barrier paper. It is an acid free layer that keeps the backing board that has an acid content away from the print, and therefore prevents damage to the print. 

Acid in the backing board and paper causes yellowing and deterioration. You may have found old prints with little holes in them, while some may be due to insects they are also caused by the acidic materials placed next to the images.

*************************************************

Until the next time let's all do what we love, as much as life will let us, and enjoy all the beauty in this world, natural and man's creations! Just like the Bible tells us, think on all that's good and pure!

Love 'n' prayers.
Janet Toney


Monday, August 8, 2016

Painting with Pencils!

 Pencils! Soft leaded ones, in lots of colors!


For no particular reason, than I fell in love with a couple of teddy bears in a magazine picture, I've begun working on a painting of them. I'm using pencils and the more I use these soft leaded wonders the more it feels and looks, to me at least, like I'm painting with pencils. It's great fun. Hope you enjoy the pictures of my beginnings here and then in a day or so, I'm sure I can post the finished piece.


Finished it!


Used white acrylic over the pencil to soften it and add light, and made a pretty good window! So now it's a mixed media painting! but mostly pencil. I like it OK.

Time to move on to the next works. Flowers for a nice lady.

Thursday, July 28, 2016

Pet Portrait is Next Artwork

Today I began work on a pet portrait for a lady. The doggie was her friends dear pet, and he passed away. As a gift to the owner my customer wants a portrait of the dog with a "rainbow bridge" and entrance behind the pet.

This is the sweet doggie, a Golden Retriever, named Alley. Haven't quite decided if I will use pencil or watercolor or some combination of media. One thing is sure, this cutie will be a pleasure to draw and paint!


Is this sweet doggie smiling at us or what!?


This is my beginning pencil drawing.
Sorry my camera worked like a mirror,
 making the wording backwards! 

Please check back for more views of my progress!

If he'd been mine, I'd want a portrait to remember him by too!

Progress today. 


This evening I finished the portrait.


I used pencil, colored pencil, watercolor pencil and acrylic paint.
Ready to send the picture of the finished painting to the customer.


Made some additional tweaks, and cut new double matt.
He's on his way to Canada!

On to the next paintings.
Two floral paintings, 8 x 10s. Have photos of the flowers to pick from so should be able to begin working next week. That's all my commissions for now.

Monday, July 25, 2016

No Art on Paper Yet - Another Mural


This past week end we visited our daughter and her husband about three hours north of us. Our daughter has been talking to me about a message board, because, friends gave her a can of chalk board paint. It wasn't inspiring to me at first. But then, she asked again while we were visiting. I looked around her kitchen, and there it was. She had some curtains, the border had three different chefs with diamonds in black and white under that. 
First I said, "We ought to make the board with the black and white border like on the bottom of the curtains. 
"OK.", she said.
And then insanity took over and I said, "OH, Susie we could make the entire board one of the chefs!" 
"OK!.", she said.
"The chef could be black for the board and I could just leave white to draw the picture."
 "OK.", she said, a bit confused.


So there it was a simple request turned into a biggie, and a marathon painting project!
It was fun, however, and I hope it makes Susie and Bobby smile and that they can actually use it.
Also, hope the cork and dry erase board we nailed up never wears out the.Because shhhh, don't tell, I didn't paint under it.

The chalk board paint was thick and difficult to control. Straight lines were hardest. It was difficult to get enough paint on the brush to make smooth strokes. Straight lines work best when the paint is not too thick, not too thin, and allows the brush to be loaded with enough paint to let the painter make long steady strokes. 

Good Start!


Completed Mural

It was such fun to paint this, and to do it for my sweet daughter! Spent about 15 hours on it. That was a nice chunk of the time we had with our daughter and son-in-law. Wore myself out! Last night I slept for about 23 hours!


They have two dogs. The one that is still a puppy, was very curious about what this was and what I was doing. I asked him if he was watching closely so he can paint the next mural for them! 


I'm ready to do another one! Really, I guess I'll concentrate on a couple of florals in 8 x 10 for one lady, and pet portrait for another.